Greetings all!
The blog has been silent the last week or so due to the fact that yours truly has been out of town. However, since returning to the homestead I have had a chance to play with some new computer hardware that I thought you might find interesting…
For some time now I have been looking for a computer capable of running the Linux operating system (as opposed to say Windows) that I could set up to run services 24 hours a day, 7 days a week. While I had an older computer that was set up for this type of work, I had a few problems with keeping it running all day and night:
- The computer is in my office and generates a lot of heat
- The computer was making an impact on my electric bill
- The cooling fans in the computer used very cheap bearings…which were wearing out. Thus, the computer was frequently generating annoyingly loud screeches due to the fans.
As I looked for a solution to this problem, I began to search the web for a low power computer (in this case, “low power” means a computer that does not consume a lot of electricity). Further investigation yielded that a number of manufacturers were just beginning to offer low power computers, with the best of them having no moving parts! I decided to investigate this hardware and spent approximately two months in the effort.
So with what I had learned, I set my goal to find a computer that:
- Cost under $300
- Had no moving parts (no spinning drives, no rotating fans, etc.)
- Used very little power
- Generated very little heat
- Could survive running 24 hours a day, 7 days a week
- Had enough power to run the Linux operating system along with one or more web servers and other services.
I found that there were a host of “fanless” computers on the market that came close to fulfilling these requirements, but sadly most of those were very expensive because the computers were designed to be used in applications where the computer had to live in a very hostile environment (for example, as an entertainment system in a vehicle, where it would be subject to both dirt and frequent vibration from the vehicle). Since I didn’t require such ruggedness (it would just be sitting on my desk), I continued to search for a system that would meet my needs and wasn’t so expensive.
Ultimately, I did find such a system, which I want to share with you at this time. I have had the system together for a little over a week and thus far I have been absolutely thrilled with how it has worked out. The system had to be assembled from three different components, all of which were available from Amazon.com.
The components of the system include the main computer, a solid state hard drive, and a memory chip as listed below with links to where you can buy them if so interested:
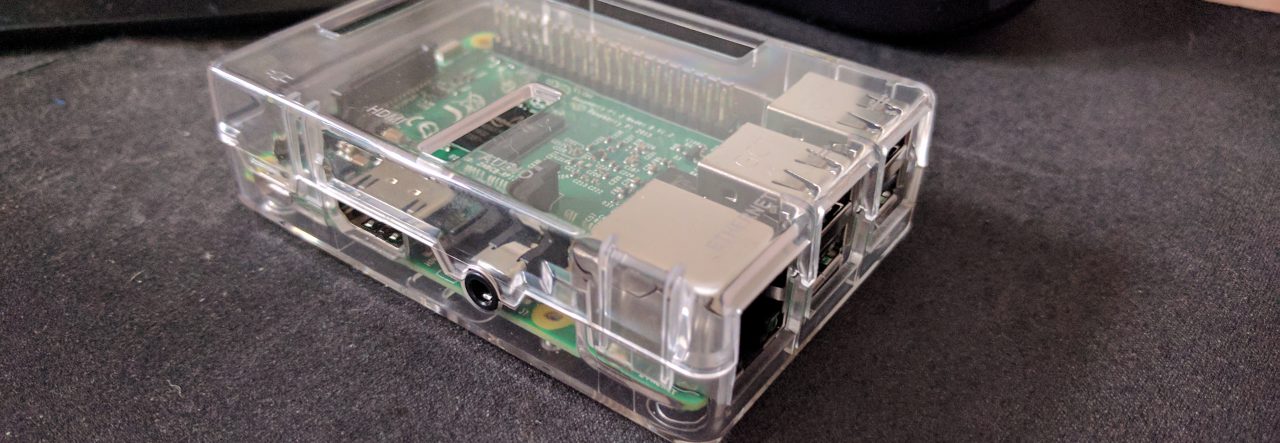
- Shuttle XS35V2 Barebone Mini PC
– approx $185
- Kingston SSDNow V Series 30 GB SATA 2.5-Inch Solid State Drive SNV125-S2/30GBKR
– approx $65
- Corsair 4 GB DDR3 Laptop Memory CMSO4GX3M1A1333C9
– approx $30
The grand total for all of these components was approximately $280 (but I had a $50 gift certificate to use, so my price was $50 less).
Assembly was a snap, as all I had to do was open the computer case (remove one screw and slide a panel back), install the hard drive (insert a few screws and pop the unit in), pop in the memory chip, and in less than 30 minutes I was ready to rock and roll.
Now some important things you need to know about this system:
- The prices above do not include a keyboard, mouse or monitor. I already had those. In my case I had a USB keyboard, which is the only kind of keyboard this computer will accept (it doesn’t have a jack/port for a PS/2 style keyboard), a USB mouse (again, to use a mouse you MUST have a USB mouse as no other mouse port is available), and a simple monitor.
- This unit DOES NOT COME WITH AN OPERATING SYSTEM! That means if you want to run windows on this computer, you must buy a copy of Windows. Since I was interested in using Linux, Linux is available for free so there was no problem. However, I saw several reviews where people successfully and happily ran Windows XP, Windows Vista, and at least one version of Windows 7 (just make certain you have enough disk space on the solid state hard drive to run Windows 7…you may need a bigger drive).
- This unit does not come with an optical drive (DVD or CD drive). In my case I knew that I could install linux from a memory stick onto the hard disk, so I did not get an optical drive. The computer CAN take an optical drive, but it has to be a slim factor laptop drive, which can be had on the cheap ($25 or less). Since I didn’t have need of such a drive, I skipped it.
- If like me you wish to run Linux on this computer, you should know that running 64-bit Ubuntu server ran into a minor problem where the network card was not recognized during installation (apparently the desktop version of Ubuntu Linux recognizes the network card just fine, as does several of the other flavors of Linux). The fix for this was about two lines typed into a config file, and feel free to leave a comment here if you need that specific information and I’ll respond with the info.
- The computer comes with a wireless network adapter as well. At the current time I have not managed to get the wireless card working under Ubuntu Server, however, I have located some online directions where a user of this same computer and also running Ubuntu server has managed to get it running. I will be testing out that process in the coming days, but no problems are expected.
Now, I would also like to point out that my purpose for this computer DOES NOT include having it run a home theater system. I found during my investigation that many people were looking for fanless, low-power computers to run their entertainment systems at home. The problem you would have with this computer is that it does not have an HDMI video output port. If you want a fanless computer for use in your home entertainment system you can look to the upgraded model of this computer that DOES have an HDMI port (the Shuttle XS35GTV2 Intel Atom D510 1.66GHz, Intel Socket BGA559 Intel NM10 NVIDIA ION, but shop around…the price I saw at Amazon.com was NOT the cheapest …NewEgg.com had it cheaper at the time of this writing).
Another thing I should point out is that this computer will NOT be able to play the latest and greatest computer games. Reviews I read said it could play most of the older games, but if hard-core gaming is your desire, this is not the computer for you. If you are a moderate gamer and don’t have to play the latest games, this may work for you. Since gaming was not one of my planned uses for this machine, this was not an issue.
I would also like to point out that the form factor/footprint of this machine on your desk is very small! The system comes with a stand and you really do need to stand the computer on its end for ventilation purposes. The form factor is approximately the same size as a large format paperback book (approx 10 inches by 1.5 inches wide, but the oval base sticks out a bit wider than the 1.5 inches in the middle where it attaches).
Finally, I think I should give you, in an easily readable format, the specifications for this setup:
- Dual core Atom processor running at 1.8 gigahertz (this is a 64-bit processor!)
- 4 gigabytes of RAM
- 30 gigabytes of Solid State Disk storage (like a hard drive but no spinning platter or moving parts)
- 1 network card for wired networks
- 1 wireless network card
- Audio in and out
- VGA graphics out
- 5 USB ports (all are USB 2.0)
- 1 SD Memory card slot
- Intel graphics media Accelerator 3150 chipset (will NOT run the latest graphics intensive computer games)
For my purposes, this machine has proven to be absolutely what I was looking for both in price and performance. Your mileage will vary, depending on your intended use.
Mirage
Okay, so I decided to just append the information you will need to get the ethernet card working for this particular setup. I will post the wireless setup as a comment as well once I have it working on my computer. Please note that I cannot avoid this getting a bit technical, so I apologize to my targeted readers…those people who are interested in technology but not necessarily technology gurus themselves.
So to recap, I have Ubuntu 11.04 server (the 64-bit version that does not come with a windowing graphical user interface…though you can load one after you have it installed) installed on mycomputer.
What you need to know is that the network card uses the JMicron JMC250 PCI giganet ethernet controller. You must first install the module that supports this controller (which oddly enough is automatically installed with Ubuntu Server 11.04…it is just not “activated” during the install for some reason. Hopefully later releases of Ubuntu Server will have this oversight corrected so these extra steps are no longer needed) and then set up the config file for your networking (the config file is located at /etc/network/interfaces, but we’ll go more into that in a moment).
To set up the module that has the correct network driver you need to enter the following commands at the command prompt:
sudo modprobe jme
sudo depmod -a
You then need to restart your network services. There can be more than one way to restart networking services depending on your computer’s setup, but the universal method guaranteed to work is to reboot your computer. However, don’t reboot until you perform the steps below to configure your network card interfaces file.
Next, you must set up the network controller in the /etc/network/interfaces file (if it is not already set up, which it probably is not). To edit the config file you can enter:
sudo vi /etc/network/interfaces
In the above case I specified the vi editor, but you can use pico or any other editor that you like. I am going to assume that you know how to edit a text file in Linux. If not, you will have to do a bit of reading on the vi editor (or whatever editor you choose) first.
Once the file is open for editing, add the following lines:
auto eth0
iface eth0 inet dhcp
I am assuming that your ethernet card is being recognized by your computer as eth0…which is how it was recognized on my computer.
Once the lines have been added, save the file and then reboot your system (you could restart the network services as well if you know how to do that…rebooting works just as well). The above two lines indicate that your ethernet card should obtain an IP address from a dhcp server on your network. If you do not understand what this is you should speak with whomever set up your network for the details. In most cases this dhcp set will work just fine for you.
If you want to choose your own IP address (let’s say 192.168.2.59 for example) for this computer instead of having it assigned by the DHCP server, then you would enter the following lines instead:
iface eth0 inet static
address 192.168.2.59
netmask 255.255.255.0
gateway 192.168.1.254
The “netmask” and “gateway” values given above will likely work for you, but if you encounter any problems you will need to consult whomever runs your network setup (which might be you…in which case you may have some reading to do if you don’t understand these lines nor why I am telling you to set them) to determine the correct values for netmask and gateway.
Remember to reboot your machine and you should be all set.